Before You put engine in to the car
Hi, most of actions on new engine is best done when it is not yet installed in the vehicle, because,
as we will see when the engine is installed multiple elements will not be able to get.
The main activities after buying the engine are:
Changing the timing belt with tensioner.
Water pump replacement.
Oil and filter change .
Changing the spark plugs and wires.
If someone wants, replace the seals.
Mounting alternator and starter.
Move the crankshaft position sensor.
Replacing the timing belt with tensioner and water pump.
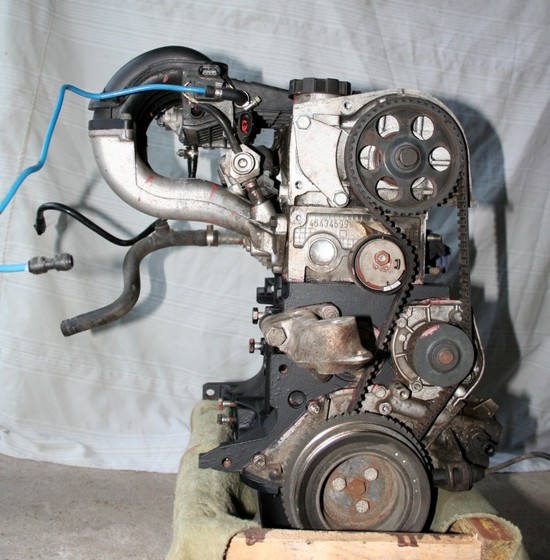
I'll show you how to replace the timing belt in garage conditions.
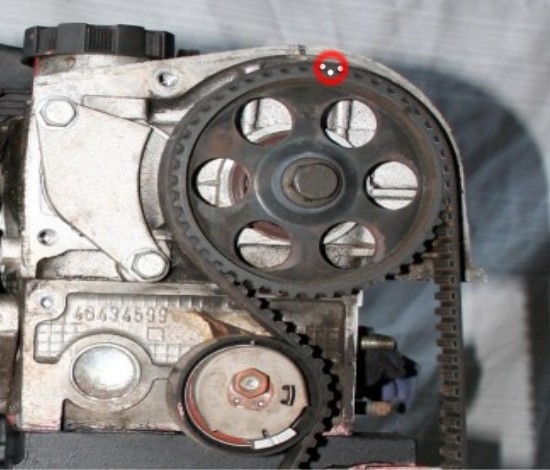
When you remove timing belt cover (
1.2 16v has an upper and lower cover ) our engine looks like this:
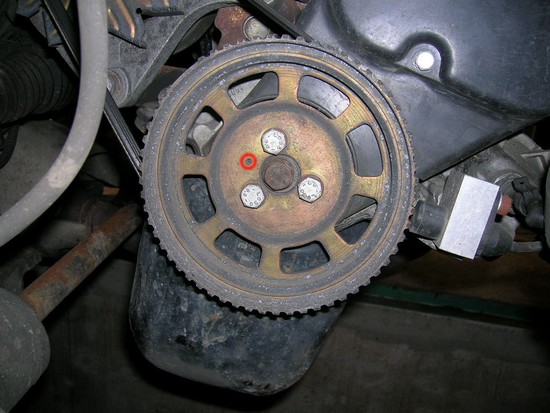
Then white felt-tip pen (
preferably oil because it is dense ), we put three points, two on the timing belt and one on the pinion driving the camshafts. In this way:
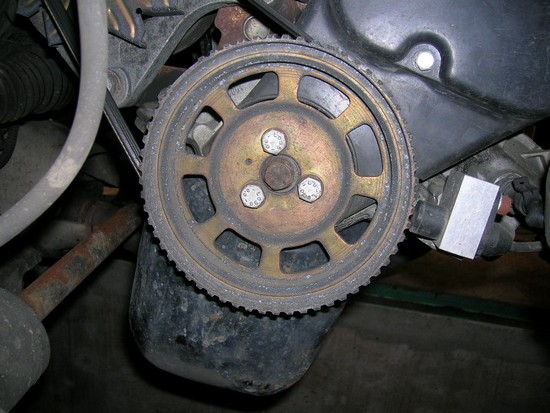
Then take off the pulley.
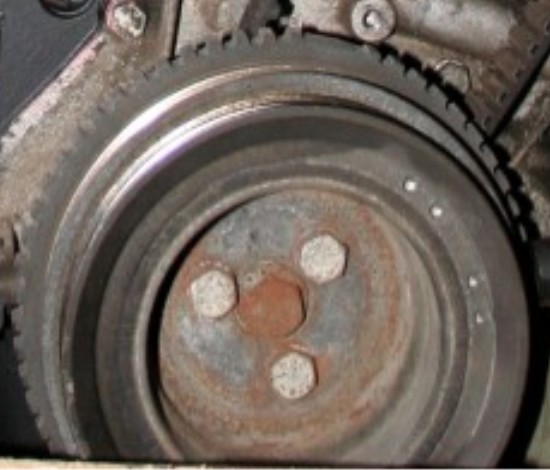
Behind the pulley is sprocket driving the timing belt. Mark on it one white point and two on the belt, the same way as before.
(
I didn't have picture of this part)
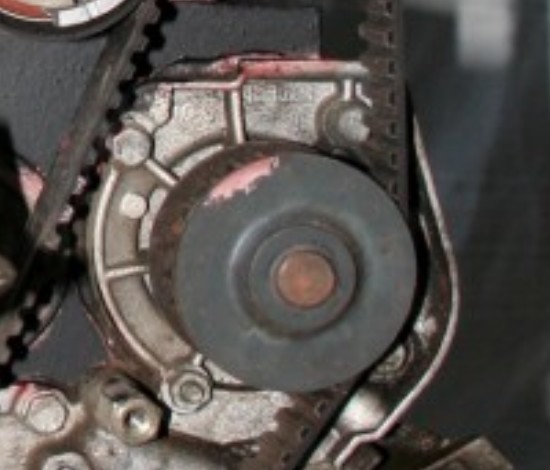
Now we can remove our transmission belt. To do this, unscrew the timing belt tensioner.

Then take off the water pump fixed on 4 screws..
When you have replaced the water pump for the new one, we put on a new belt white points from the old. You should put belts to each other and carefully move the points
This is a very important .
Wrong marked could result engine damage by collision with the piston and valve. Once you marked the points assume a new belt so that the points on timing belt coincide with points on the gear driven camshaft and timing belt sprocket.
The last step is to fixed the tensioner. Before tightening the tensioner should give it a preload of by twisting the mobile part will be the maximum deviation to the right.
After tightening and releasing the tensioner should return to its normal state of tension. I mean,
1. pointer moving part should be in the axis of the
2. pointer of the fixed part. It looks like this:
At this point, our engine is again ready for use but before his firing recommend manually "turn" the engine through the key on the motor shaft. In this way, will check whether there is no collision follows. To ease yourself I recommend twisting off all the sparks from engine.

Alternator and starter fixed
The next step is to mount the new alternator from Cinquecento
Sporting and pulley also from Cinquecento
Sporting . When the engine is take out is easy to do that.
I marked on the photo
1. Alternator , 2.Pulley, 3.Engine supply from CCS (Cinquecento Sporting) and 4. Screws fixing alternator.
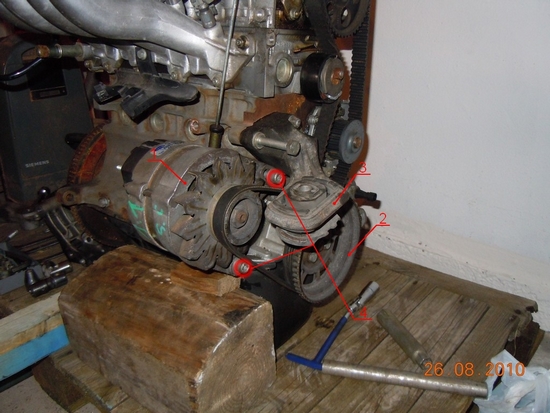
Regarding the fixing the pulley it should be noted clove made at the end of the shaft. Clove should hit the retaining hole. Otherwise, you don't start the engine.
You should fixed starter after fixed engine with gearbox, for that moment is it unnecessary.
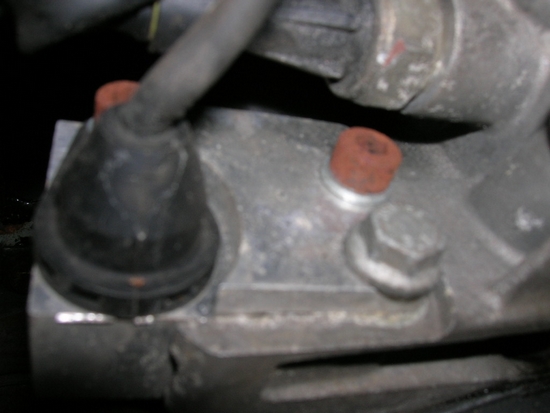
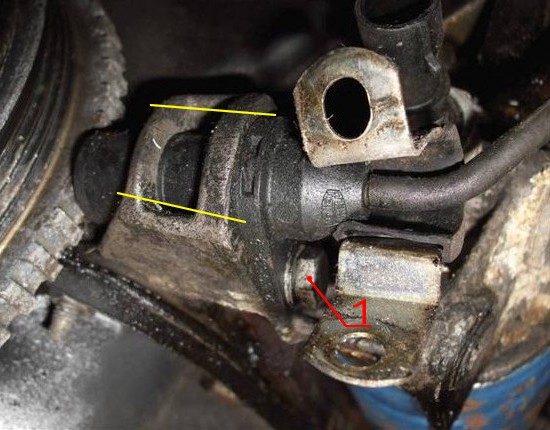
Przesunięcie czujnika położenia wału korbowego.
Ponieważ zmieniliśmy koło pasowe a w Cinquecento
Sporting zęby dające impulsy dla czujnika znajdują się "po drugiej" stronie należy przesunąć czujnika położenia wału korbowego.
Przedstawię dwa sposoby jak to zrobić.
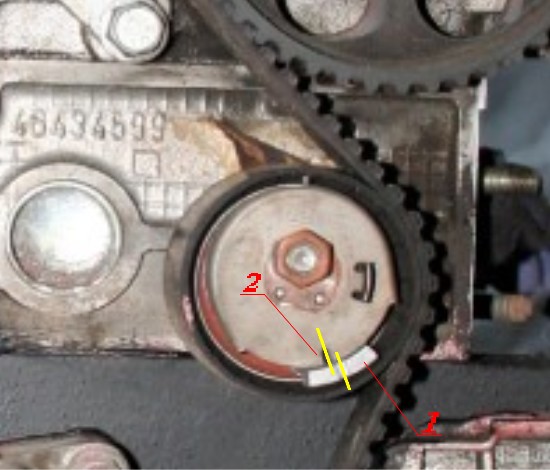
Pierwszy sposób możliwy jest do wykonania w warunkach garażowych. Należy rozciąć element mocujący czujnik w miejscach oznaczonych
żółtymi liniami. następnie przesunąć go na żądaną odległość (
należy pamiętać, że odległość czujnika od zębów musi być taka sama i powinna wynosić od 0,5 do 1mm). Gdy ustalimy odległość należy zaznaczyć nowy punkt dal wkręcenia
1.śruby
którą, przykręcony jest czujnik. wywiercić otwór (
pamiętając, że jego średnica musi być mniejsza od średnicy śruby) a następnie go nagwintować. Jest to Najprostsza metoda przesunięcia czujnika położenia wału korbowego. Osobiście bym jej nie polecał ponieważ czujnik nie jest pewnie umocowany.
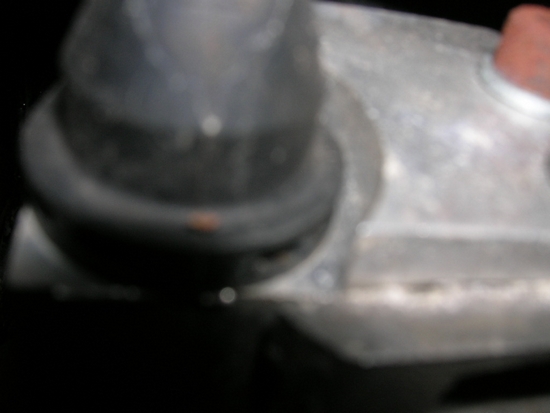
Drugi sposób zdecydowanie pewniejszy od pierwszego ale potrzeba do niego frezarki (
ewentualnie samego frezu, imadła i wiertarki). Podobnie jak w pierwszym przypadku wycinamy fragment uchwytu czujnika położenia wału. Następnie nawiercamy kolejny otwór w uchwycie tak aby znajdował się w linii prostej ponad otworem do którego była wkręcona śruba mocująca czujnik.
Następnie wykonujemy element do którego, będziemy przykręcać nasz czujnik. Ja wykorzystałem do tego aluminiowy blok (
lekki i nie rdzewieje) w uchwycie tym należy wykonać dwa otwory mocujące go do oryginalnego mocowanie czujnika w taki sposób aby pokrywały się z otworami wykonanymi w oryginalnym mocowaniu (
otwory w nowym mocowaniu nie muszą byc nagwintowane ale muszą być ciasno pasowane aby całość była dobrze ustawiona)
Schematyczny rysunek nowego elementu przedstawia się następująco.
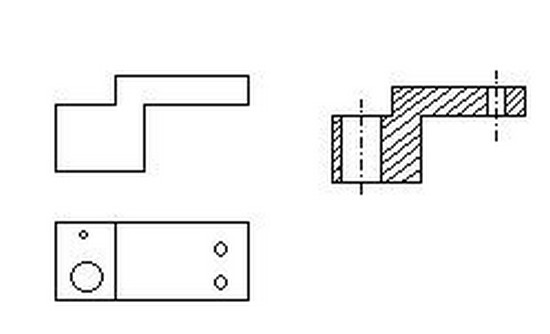
Należy pamiętać o tym, że nowa powierzchnia do której będzie przylegał czujnik musi być w tej samej odległości co oryginalna. Dla tego na rysunku jest wykonany stopień. Otwór powyżej otworu centrującego nasz czujnik powinien byc nagwintowany ponieważ tam teraz będzie przykręcony nasz czujnik.

Całość po zamontwaniu wygląda następująco.